The basics for pen making My Way are shown below, another walk through by Ray Girling is available HERE
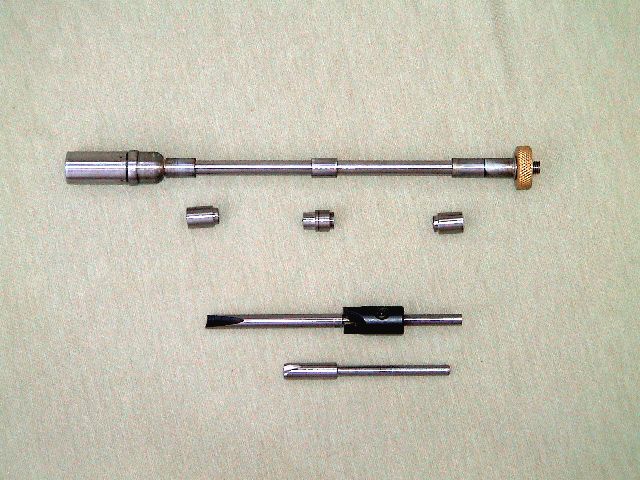
The basic mandrel, which is just a rod some 0.247” diameter, with a thread on the end (6mm) for a clamping nut and some spacers with an outer diameter to match pen components to act as size guides.
Gets a little more complicated with larger diameter pen kits when stepped spacers are required to locate the larger diameter tubes on the mandrel.
Mandrel, this one home made with alternate stepped bushes, and an alternate trim tool guide.
These are the other 'tools' I use.
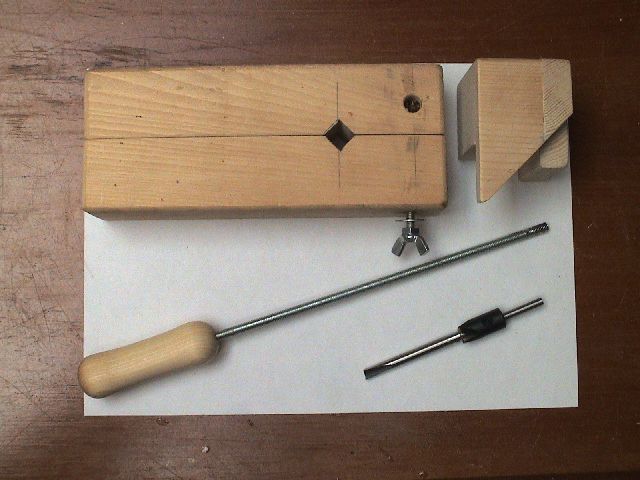
To aid the repeated cutting of blanks to the preferred size for the tubes a little cutting jig is desirable, saves the frustration of having to measure and mark each one and the inevitable cutting of your best bit of wood too short. Mine is made for the bandsaw from scrap box bits and has a moveable stop block to cater for differing blank lengths if required, but something similar less the guide strip would work for use with a fine toothed hand saw.
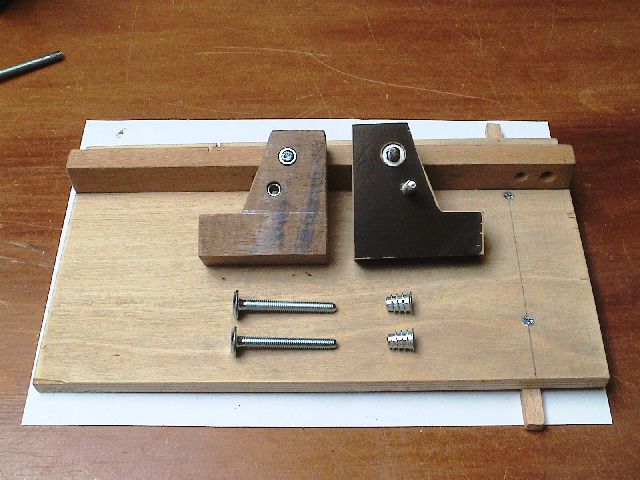
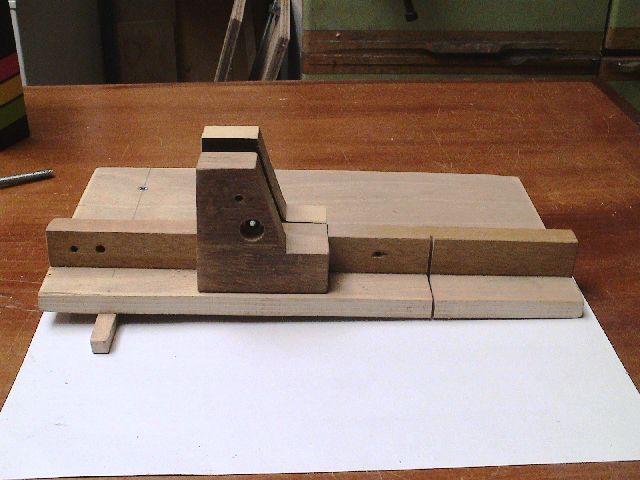
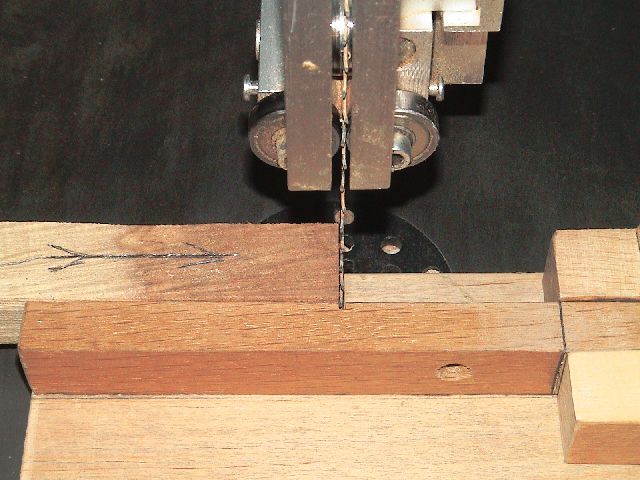
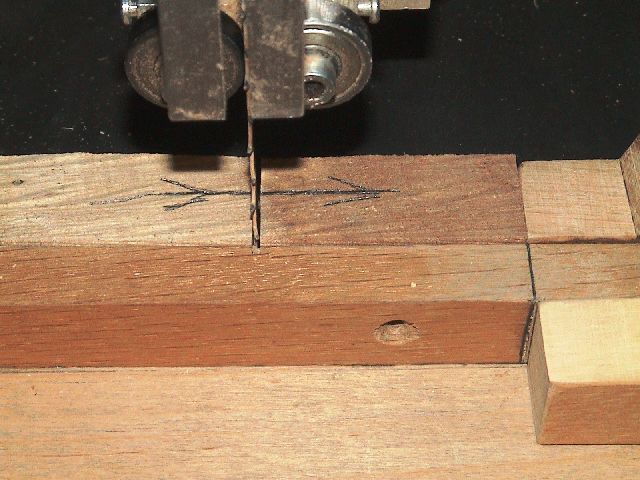
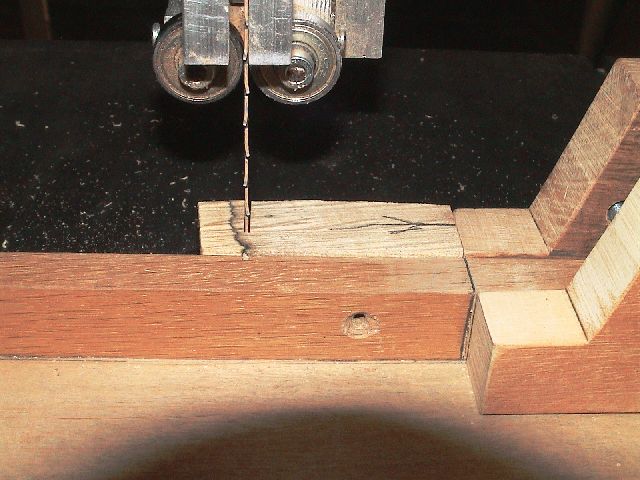
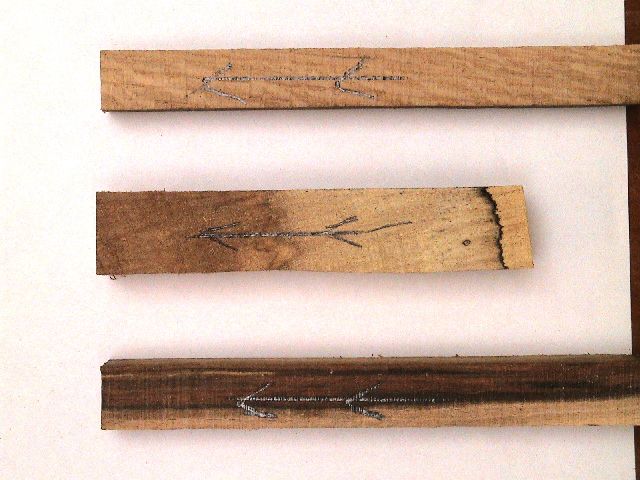
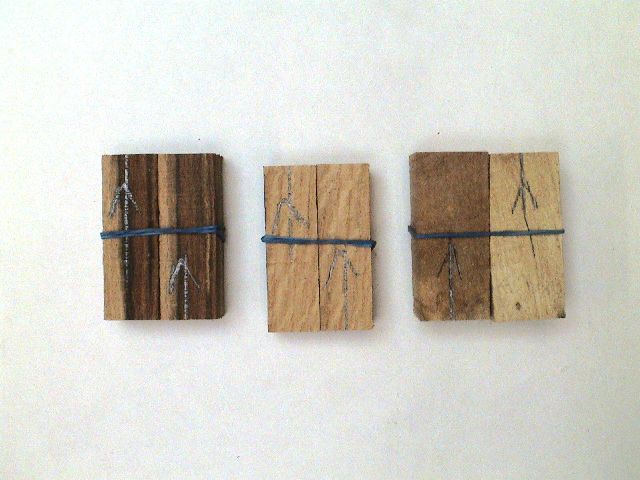
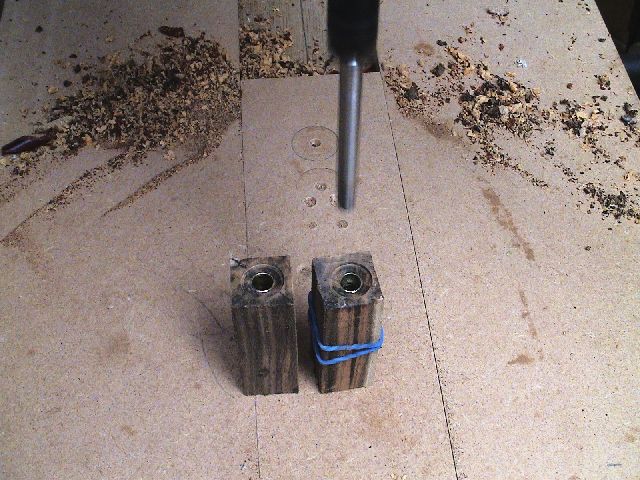
Mark all cut pairs before cutting so that the grain flow is maintained during handling, and keep them together with tape or a rubber band.
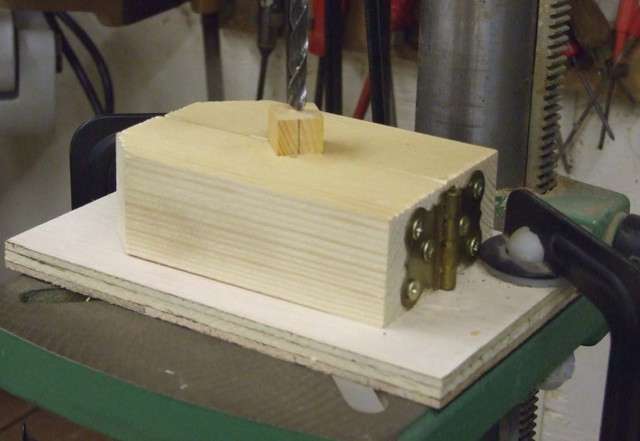
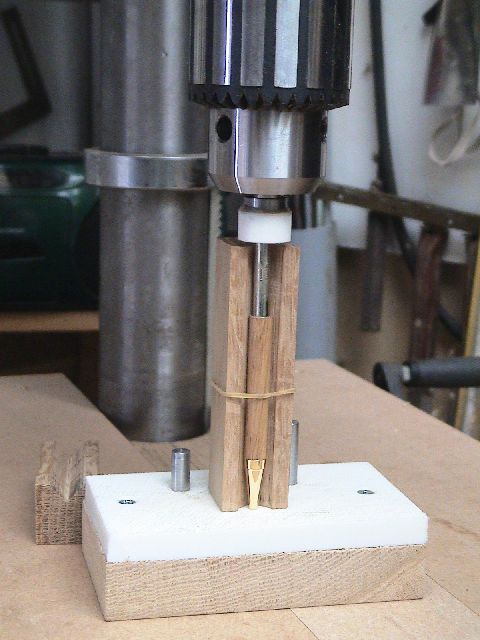
Mark the centre of all pieces for drilling, a pillar drill although not essential speeds the drilling, an alternate would be to drill the blanks in the lathe 4 jaw chuck, marking in this case is not required as you will have to accept whatever line up ensues.
A simple little jig is good enough for this and is easy to hold.
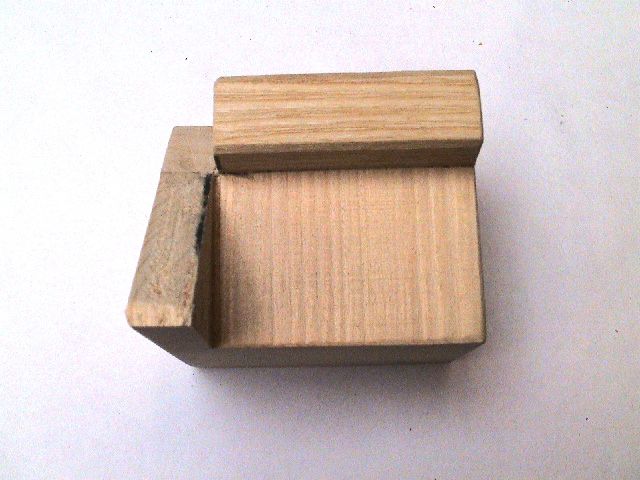
A simple hand held clamp aids the holding of the pieces to be drilled, quicker than fiddling with a vice, however if large quantities of pens are to be produced then a self centring vice would be ideal for use with the pillar drill, avoiding the need to mark the pieces for drilling.
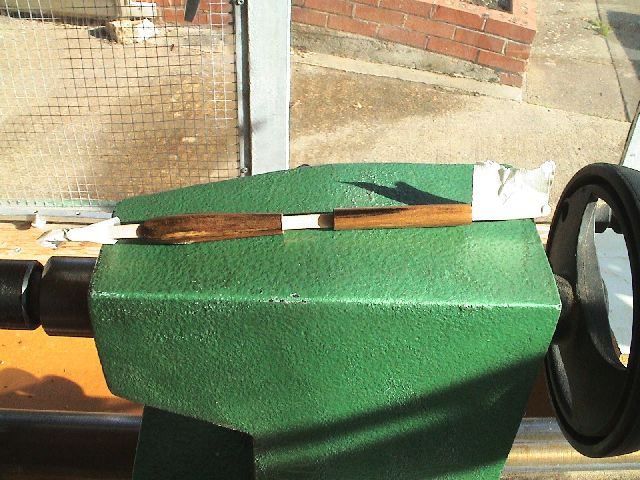
After gluing in the tubes, (which I rub up with 240 grit to increase adhesion) the ends of the blanks need cleaning off flush with the tubes.
This is most easily done with a blank trimming tool, mine is from Axminster and costs about £5.50 other brands are priced at £16-17 you take you pick. One limitation with most of these tools is that they only have a guide stem to suit a 7mm pen kit although ones with interchangeable guides are available for a price. I make my own shafts to suit differing tubes, not because they are essential, just a little more positive location in use.
One other function of the trimming cutter is to clean out most of the surplus glue (see hints & tips later) that you managed to get inside the tube.
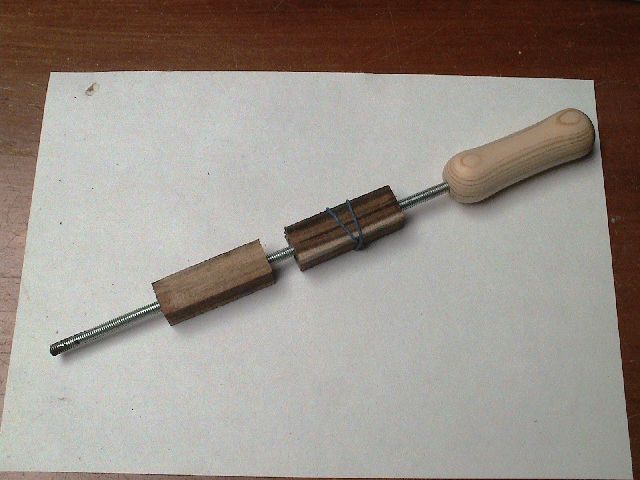
I said above most of the glue, but I find a length of 6mm threaded rod fitted in a handle is a handy way of rasping out that little bit of missed adhesive without significantly scoring the brass so that the tube slides easily on the mandrel .
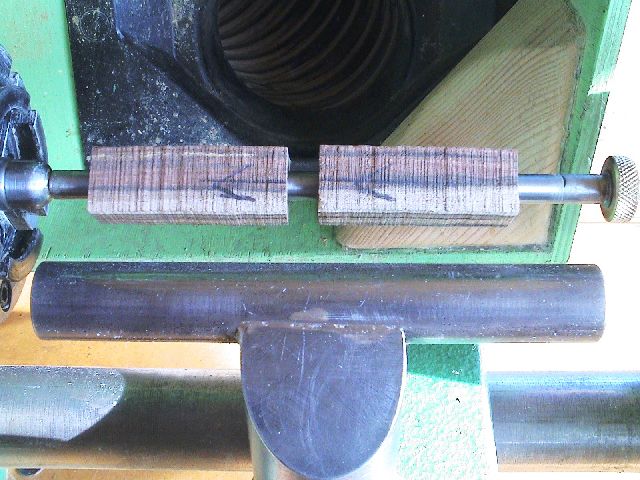
When mounting on the mandrel ensure that the grain markings tally.
When removing the finished pieces from the mandrel place them on a coffee stirrer or pipe cleaner in the correct orientation to maintain the grain match, even more significant on straight pens.
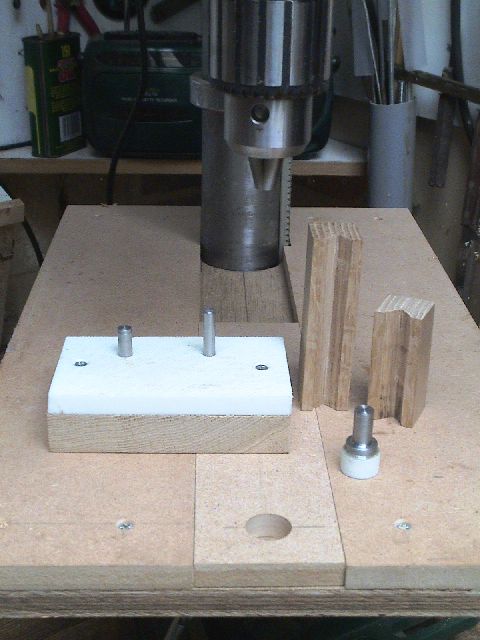
This is my setup for assembling the Pen Kits:
It consists of a hardwood block with a piece of old kitchen chopping board screwed to the top in which I have inserted two steel pins to suit the internal bores of 7 & 8mm tubes. A Punch to fit in the Drill Press chuck, again with a piece of chopping board material epoxied to the face. And a couple of hardwood Vee Blocks to support and hold partially assembled pens vertical as required.
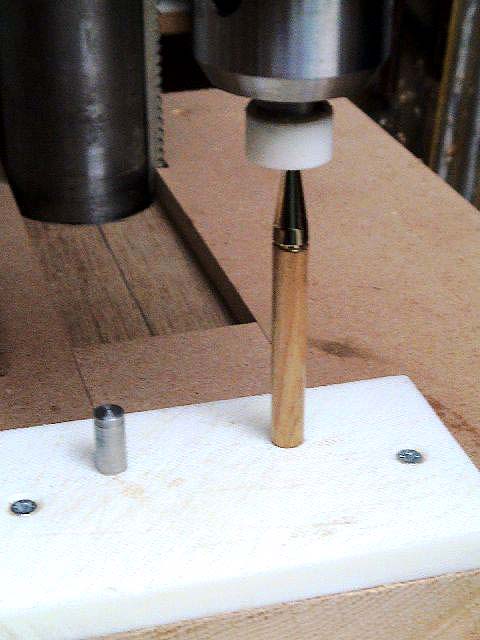
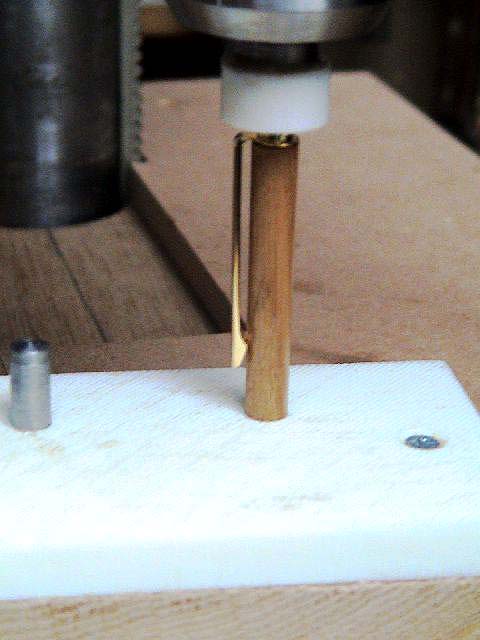
Dependant upon the style of kit and preferred method of assembly, with the Punch mounted in the drill press chuck the components can be located on the appropriate steel pin or in a Vee block.
If you do not have access to a metal cutting lathe for the steel parts then they could be made from Brass or Aluminium on the wood lathe with HSS tools, another alternate would be a close grained hardwood. The Punch could be a suitable Bolt Head, the pins broken or old drill shanks.
If you are consistently using the same make and pattern of Kits then the Vee blocks can be cut to length to act as a fixed stop when pressing in Twist mechanisms, but always check a new batch as component parts do vary between batches.
Might as well turn this bit into a Hints & Tips section:
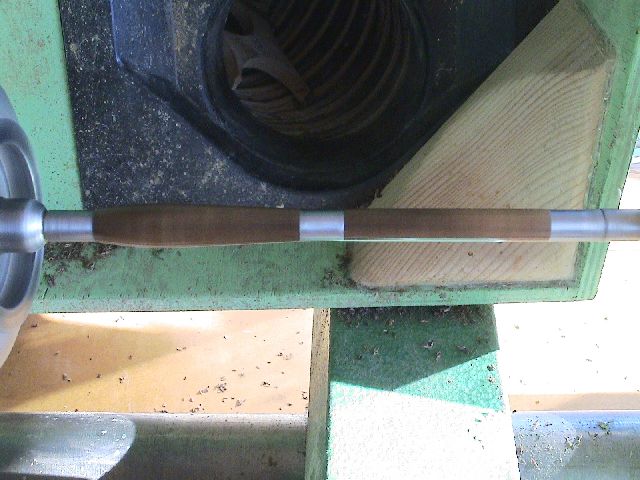
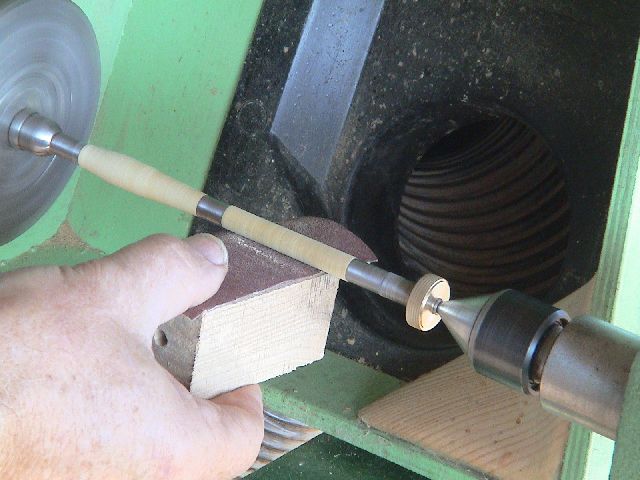
If you have difficulty in getting that straight shank, then use a block of wood behind your abrasive for the last bit until your tool control improves.
It may pay to check the actual
diameter of the insert tubes when selecting suitable drill, some of them are
thinner walled than others and a quoted 7mm may be as small as 6.75mm, results
in a lot of gap for any glue to fill especially if you use CA.
And of course can result in the wood veneer being 0.25mm thinner on one side
which can be significant with a slimline pen only being some 1mm of veneer in
the first place. I currently am using an imperial letter H (0.266") drill or a
6.8 / 6.9mm dependant on wood type. The 8mm tubes I have are on size.
Thanks Graham for the following;
Cut a 6mm slice from an old potato... push the brass barrel into it... it should come out with a plug of spud inside it... this is the end you insert into the blank when gluing... stops the glue getting into the brass barrel.
Be very cautious when sanding...heat can build up quickly and cause little white
heat spots on such as cocobolo... it can also affect the glue bond between brass
barrel and wood...
Thanks to Stuart for this one.
I put a mark, with a felt pen, on the inside of the pen blank, on the brass tube, to keep the blank orientation in line for when they come off the lathe. You just look inside the tubes and see the pen marks, makes it much easier to line up the grain, on some pens.
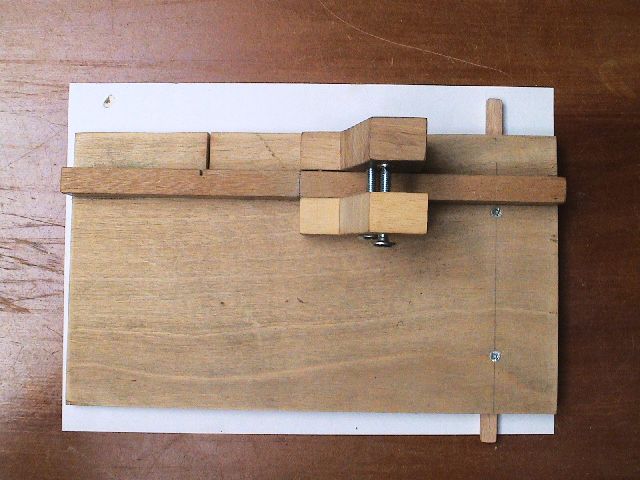
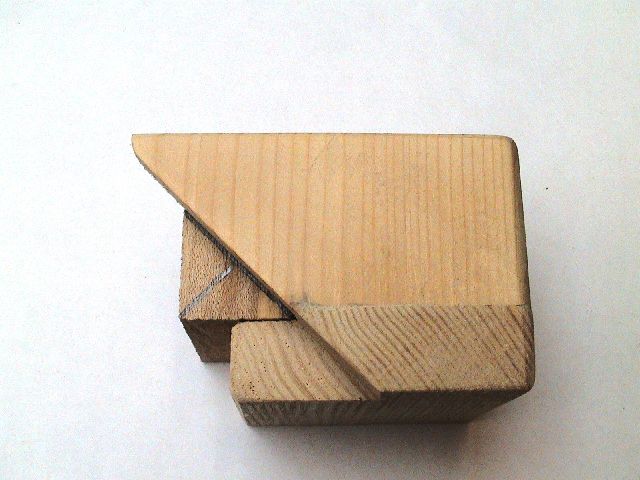
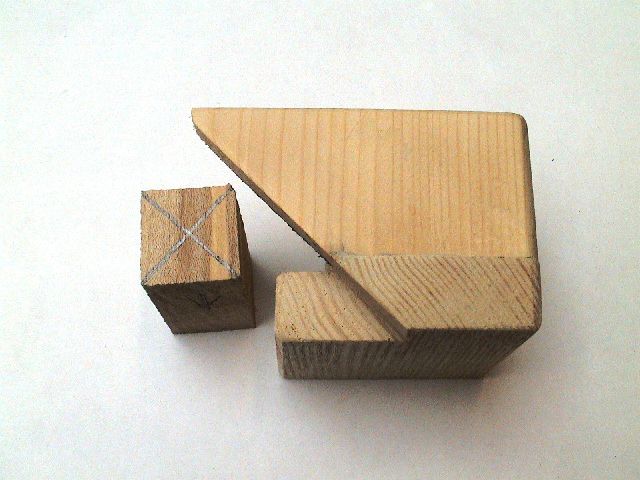
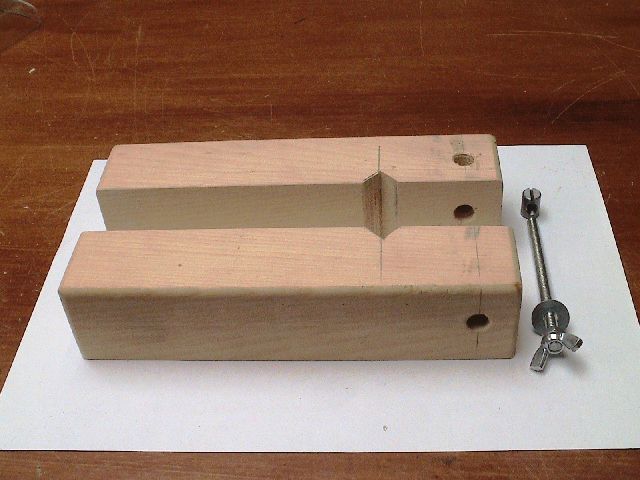
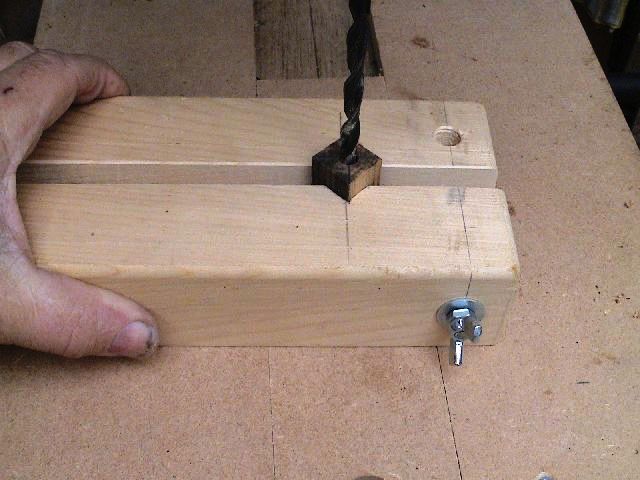
Thanks to Paul for his version of the Blank Drilling Jig.
For those who have the discipline to be consistent with their home made blanks sizes (rules me out) or a need to drill large quantities it could be a boon if a self centring chuck is not available. It is hinged one end and held together by hand, the jig is screwed to its sub base from below on one side, Aligned with the spindle centre and clamped to the drill bed. Saves having to mark each piece.